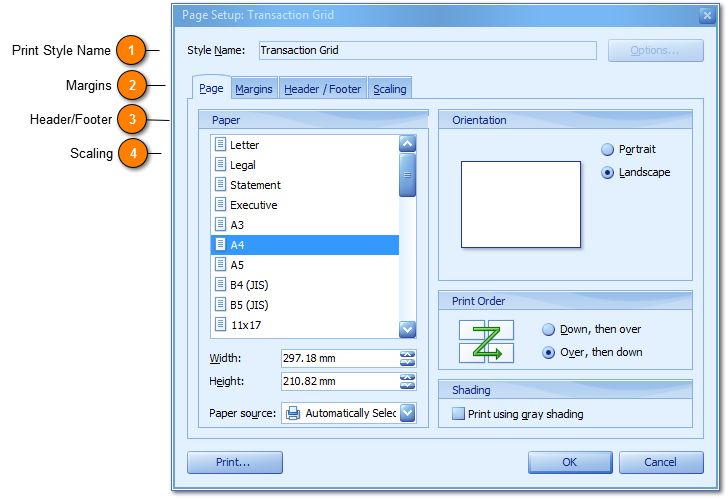
Page Setup is accessed via File, Page Setup or the spanner icon within the upper right Icon Toolbar. The Page Setup name will default based on the grid from which Print Preview is accessed (in our example the Transaction Grid) which an existing Printing System default template.
Paper - Allows users to set varying paper sizes to print the report on, or as per your printer and tray size.
Orientation - Will be either Portrait or Landscape which is defaulted as per the grid and Printing System set default with Landscape being the most common of the two.
Print Order - You can control the order in which pages are numbered and printed when the data does not fit on one page. By default, the Printing System prints pages from the top down and then left to right but you can change the direction to print pages from left to right and then from the top down.
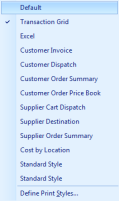
 Print Style Name
The Print Style Name will default based on the grid from which Print Preview is accessed (in our example the Transaction Grid) with an existing Printing Style default template.
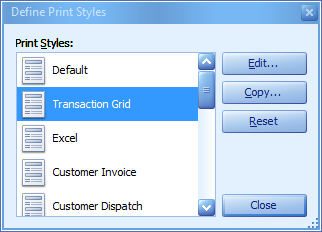
The Define Print Styles option (above) allows users to create and use their own Print Styles for reports.
1. Select Define Print Styles using the down arrow button positioned beside the spanner from the Icon Toolbar.
2. Select Copy as its always easier to edit an existing successfully setup template.
3. The Page Setup window (above) will open where you can now allocate and a new name for the Print Style template.
4. Update Page, (above) Margins, Header/Footer and Scaling options as desired and click OK to save, where the template is applied to the report and is available for selection to be applied to any report.
|
|
 Margins
The Margins tab like Print Preview of your report allows you set and adjust margins with click and drag of the dashed lines within the page or you can set these values within the numeric fields of Top and Bottom etc. Note that this tab also allows you to center the report within the printed page. Use the check boxes Horizontally and Vertically located at the bottom edge for this purpose.
|
|
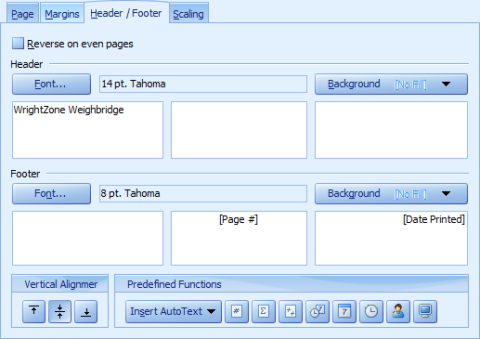
 Header/Footer
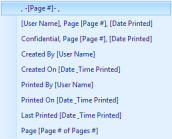
The Header/Footer tab, enables you to customize the header and footer content. You can use a number of reserved character sequences that will be replaced with service information when printing. Such character sequences can be used to display the current time, page number, etc.; you can enter these using the buttons located within the Predefined Functions group box (Insert AutoText, sampled right). You can also type in any static text you need. The image below shows the Header/Footer page with customized header and footer content. Note most setting are defaulted for you and on user edit these setting are stored and recalled automatically.
|
|
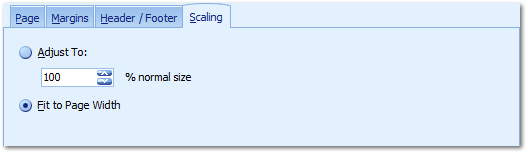
 Scaling
The Scaling tab offers the ability to reduce or increase the content of the report within the margin defined area of the page. Fit to Page Width forces all content to be within the margin width parameters of the page.
|
|